Getting Started with Decision Matrix
The idea of the decision matrix is to identify a set of objectives and options. Then weigh an option in terms of the utility values obtained from each objective. In order to measure the utility value of an objective, we need to model an objective with various parameters. Rational will goes very deep into the rich modeling of an objective. It allows you to think in terms of a goal - then it captures the type of objective, like boolean, subjective...number, etc. If you choose number type, then Rational Will lets you model a utility function. If you choose money type, then in addition to the modeling Utility function, Rational Will can let you capture interest rate and calculate the net present value too.
So, let's start with an example. Say, you have 3 candidates and you want to hire one candidate based on some criteria.
Let's define the following objectives.
1. Maximize years of experience
2. Must have a good reference.
3. Maximize communication skills (a subjective score obtained from the interview)
Start the Rational Will and click the "Decision Matrix" button from the home screen.
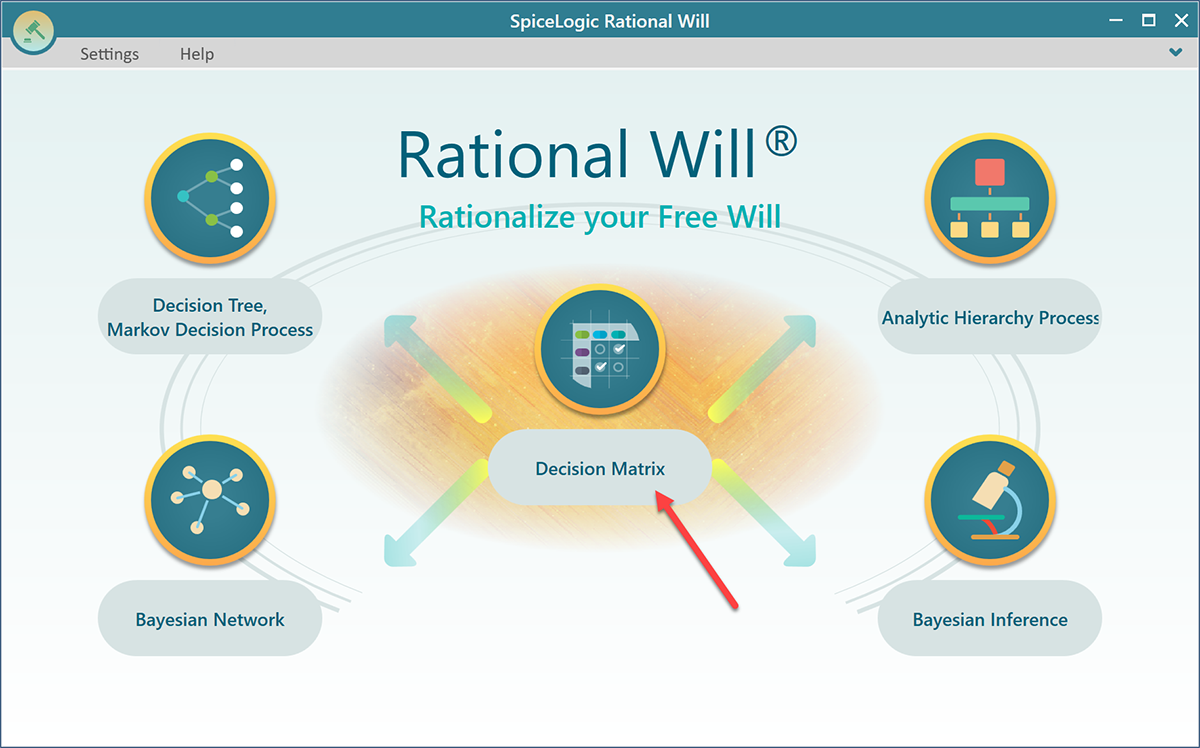
Once you click the Decision Matrix button, you will be presented with the following screen.
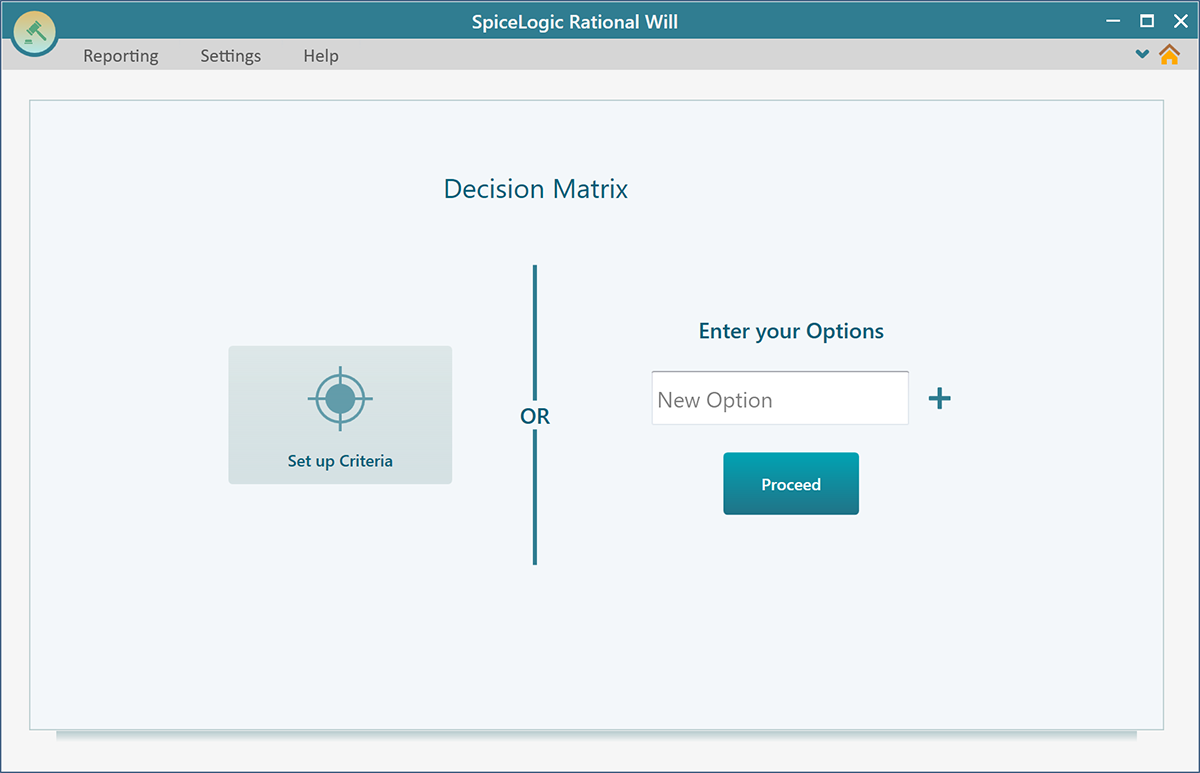
Click the button "Set up criteria". You will be taken to the following wizard page once you click that button. Select "Maximize" from the drop-down menu, and enter "Years of Experience" in the text field as shown below.
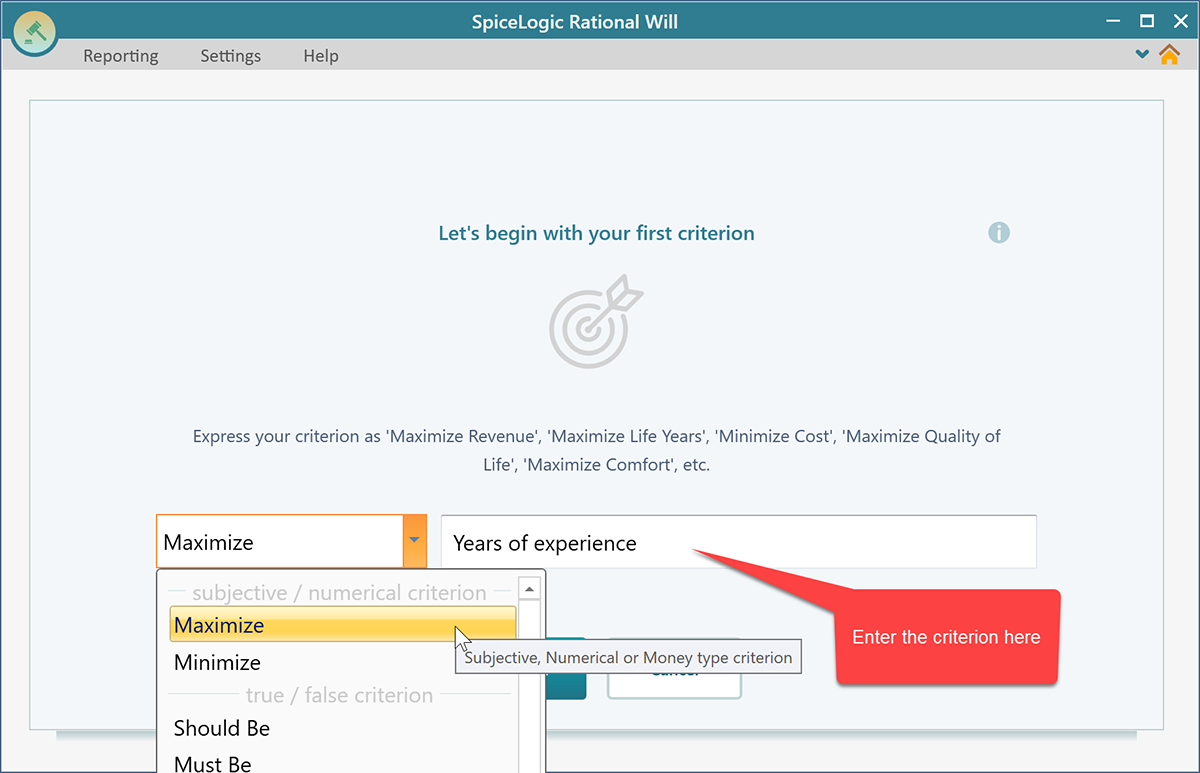
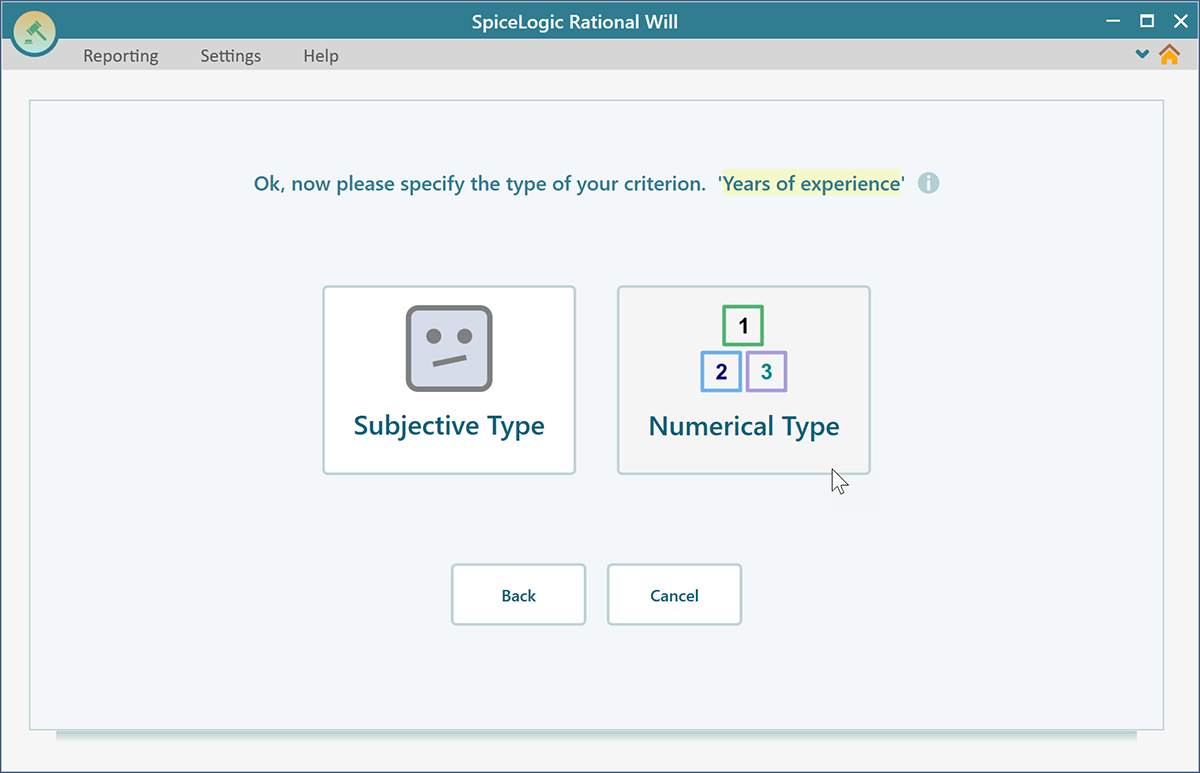
Then click the Proceed button. Once you click the Proceed button, you will see the following wizard screen. Select "Numerical Type" on this screen.
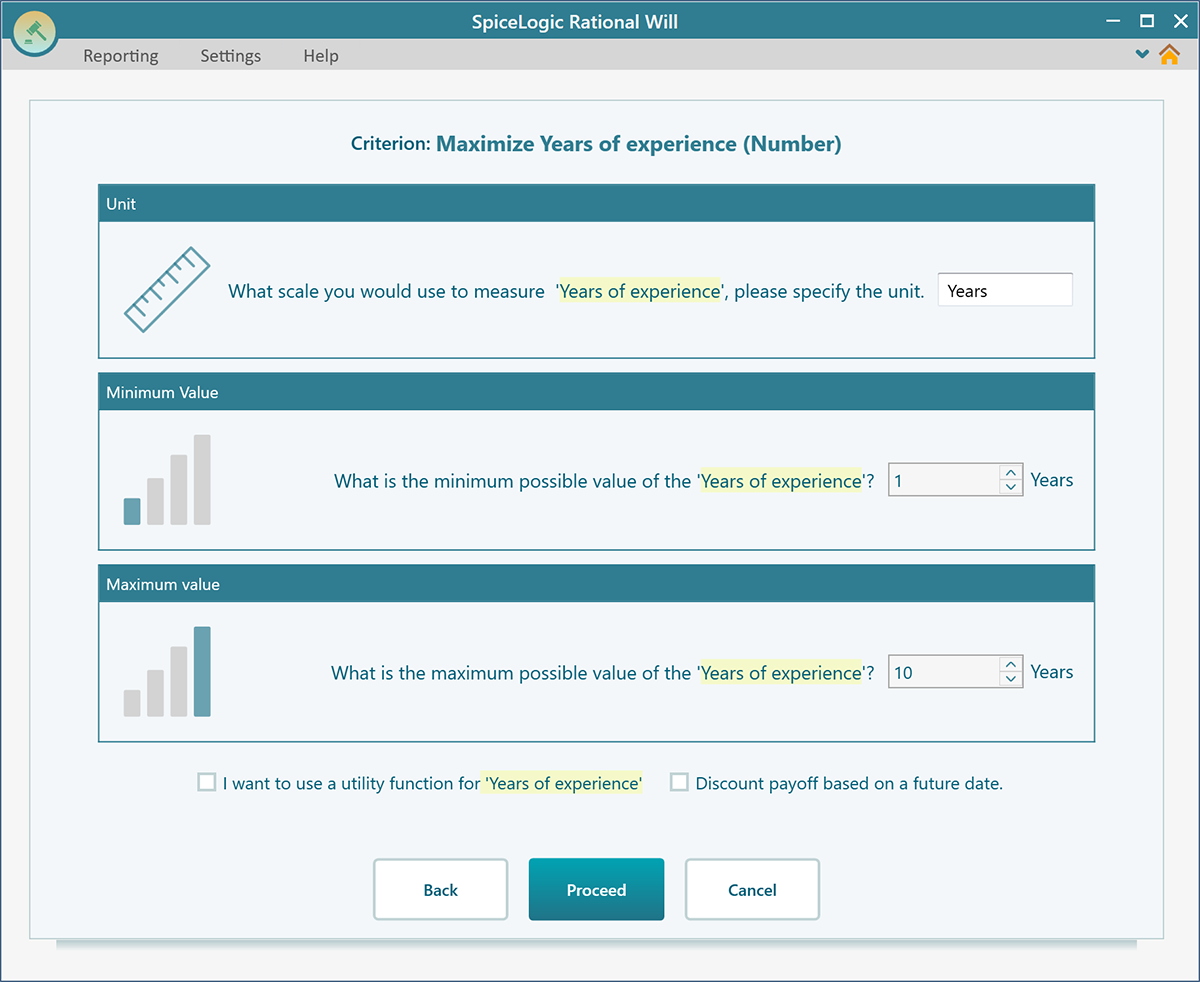
Once you click the "Numerical Type", you will be asked to enter Unit, Minimum and Maximum values. Enter "years", Minimum = 1, Maximum = 10. Then click the Proceed button.
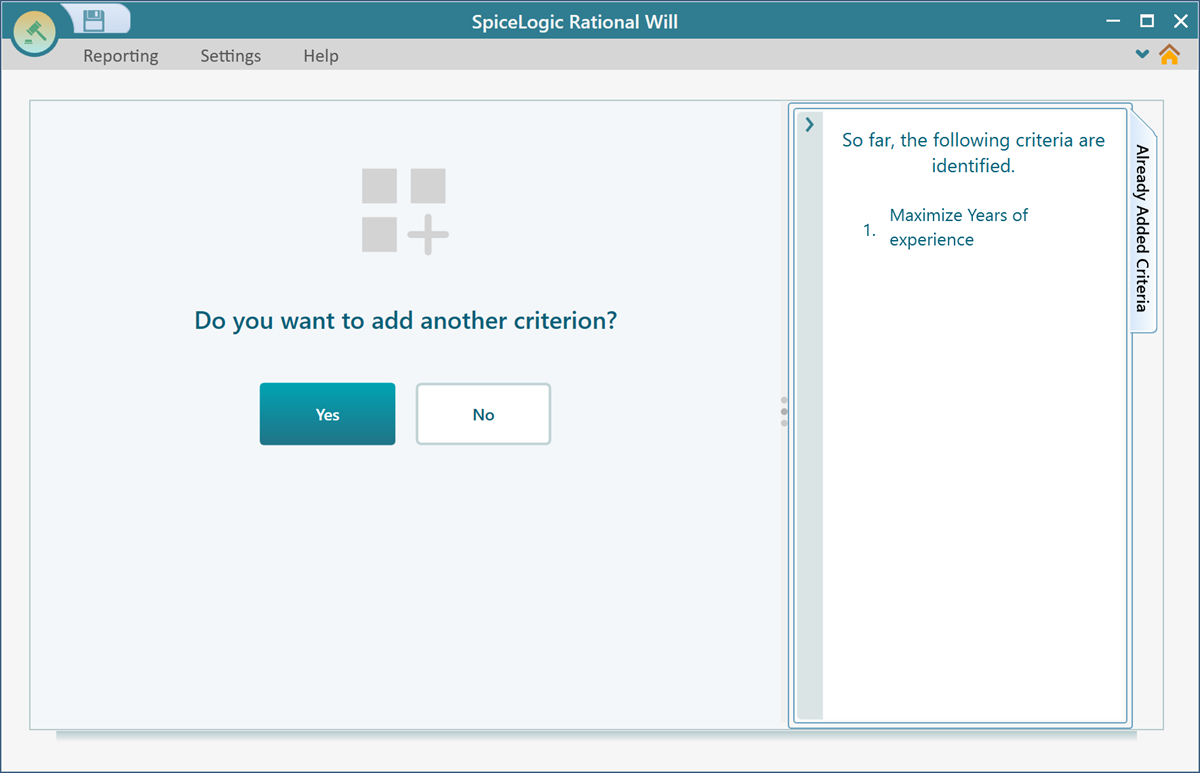
Once you click "Proceed", you will be asked if you want to add another criterion. If you have 2 more criteria to add, click YES.
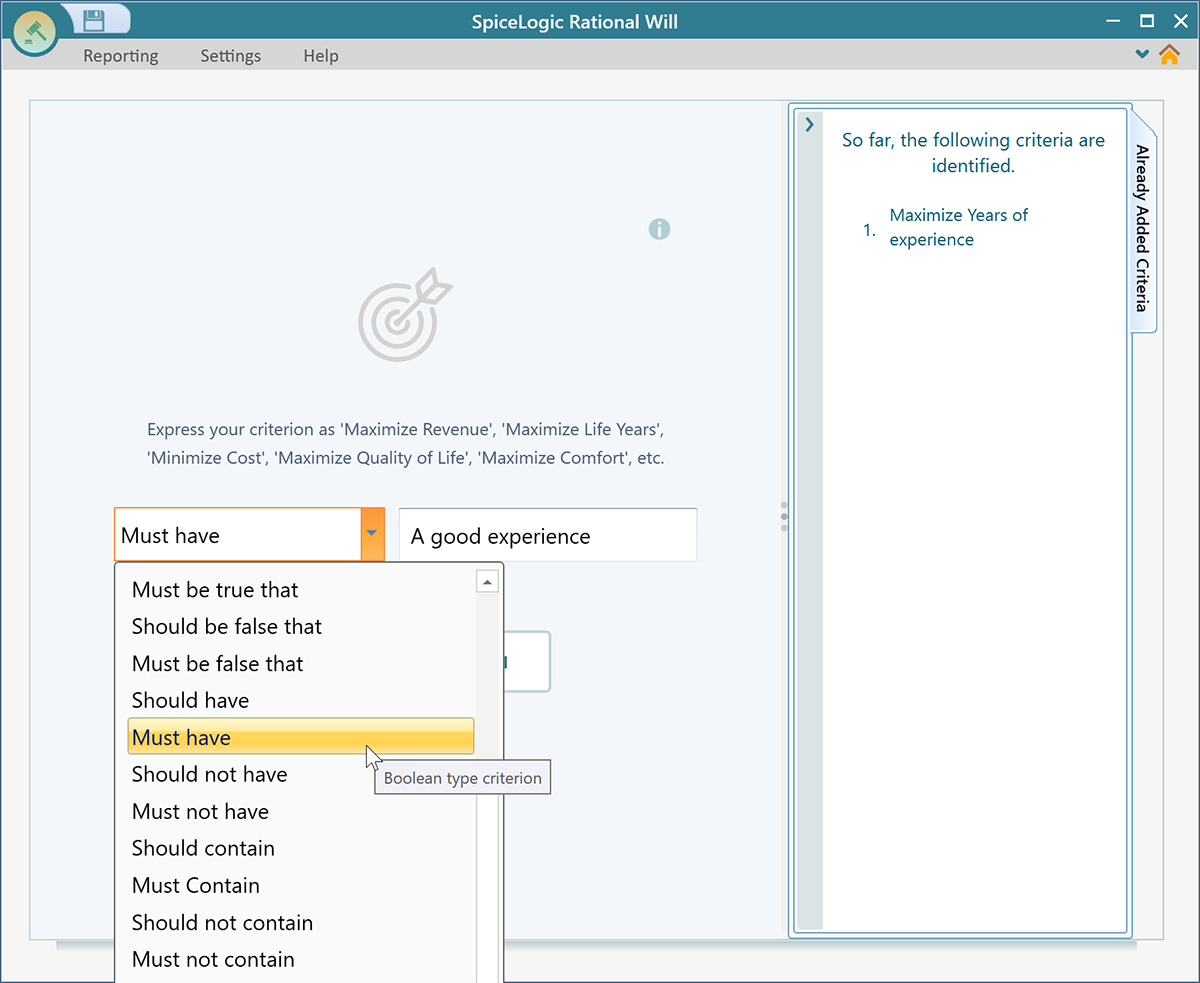
Once you click YES, you will be presented with the same screen that you were presented with before. Select "Must Have" from the drop-down box, and enter "a good reference". Once you select "Must Have", the Rational Will infers the objective type as a Boolean type.
Once you click the "Proceed" button, You will be asked, if you would add another criterion. Click YES because we have just one more criterion left. Once you click YES, you will be presented with the same criteria screen again. Select "Maximize" from the drop-down box and enter "Communication Skill" in the textbox. Then when you will click the Proceed button, you will be asked what is the type of objective. Click "Subjective" on that screen.
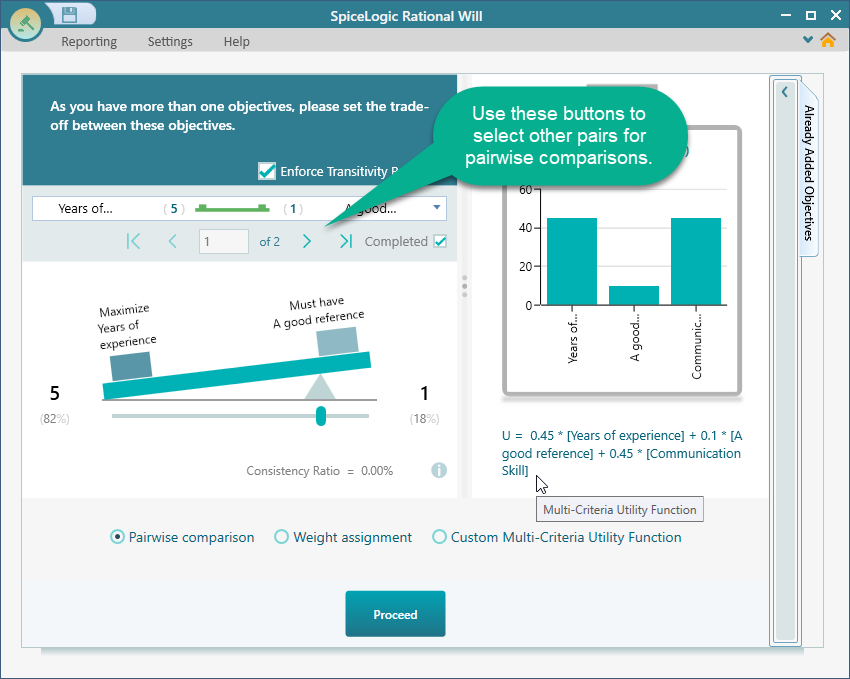
Finally, when you answer that you do not have any more criteria to add, you will be asked to express your preference between the criteria. Using such preferences, a multi-criteria utility function will be inferred by the software, that can be used to calculate the final value of the combined criteria.
Using the weight slider, you can specify which objects you care about more than another objective, also you can specify the degree of your preferences. For instance, say, you prefer the "Year of experience" 5 times as much as the good reference availability. Set the slider as shown below.
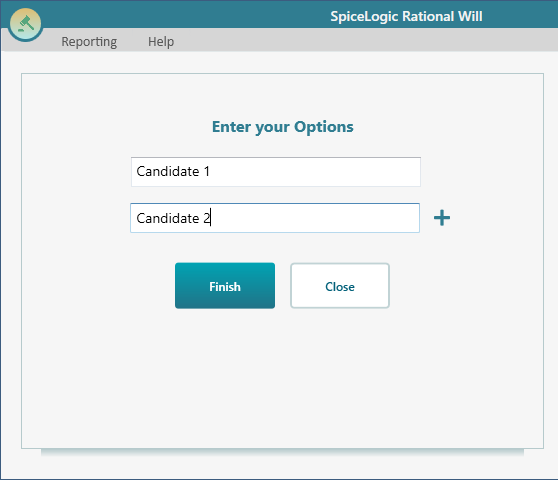
Once you finish all the comparisons and click the "Finish" button, you will be asked to identify your options. Enter the Candidate names, as shown below.
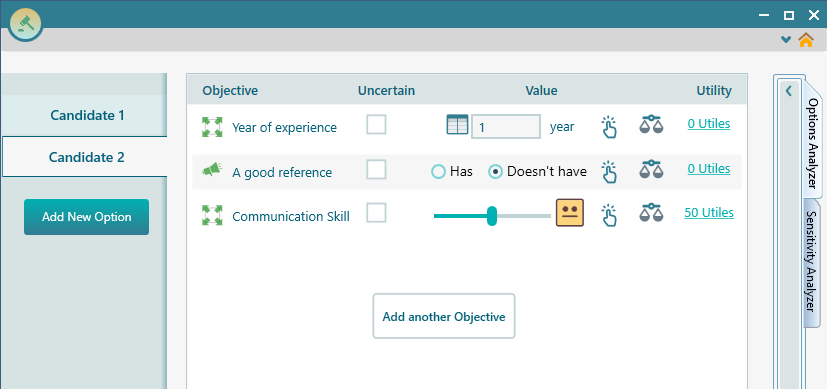
Click the "Finish" button. You will see the options page. On this options page, you can set various objective attributes for an option. Based on the Objective type (Subjective, Boolean, Numerical) you see different User interfaces. For example, Communication skill is subjective type, so you see a slider. You can use that slider to express the various degree of communication skills. Year of Experience is a Numerical type, so you see the number input box. "A Good reference" is a boolean type, so you see the radio button, "Has", "Doesn't have".
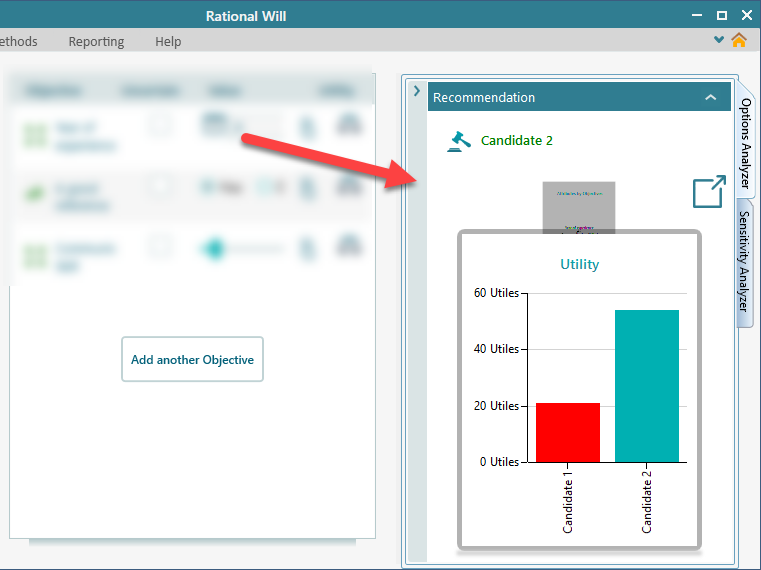
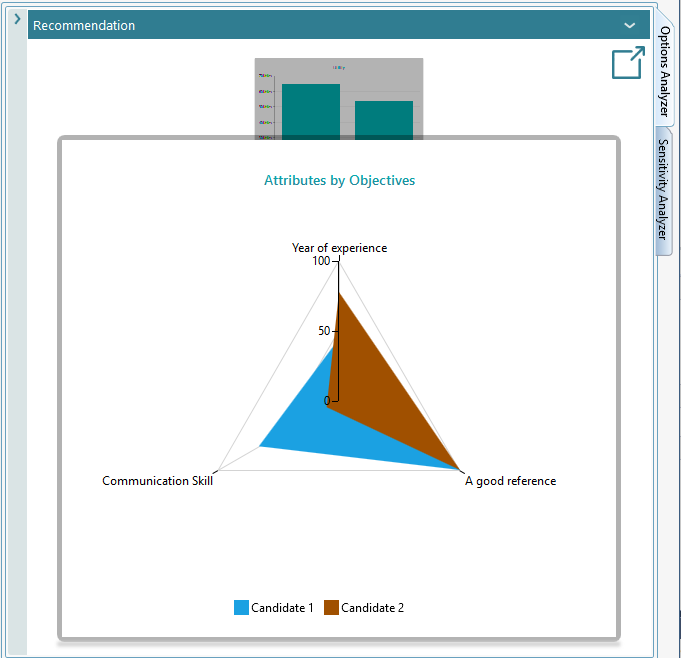
Set the values for both Candidates, and then based on your input, you will see the result in the Options Analyzer section. Based on the Weighted sum, you will see a recommendation is made for you. You will a column chart of the weighted sum for each option. Based on that chart, you can get an idea that which option suits best according to your preferences and criteria.
In the carousel, you will see the radar chart is also available to view. In order to see the Radar chart clearly, you need to resize the panel to give it some more space, otherwise, the radar chart will be shown as very small.
Sensitivity Analysis
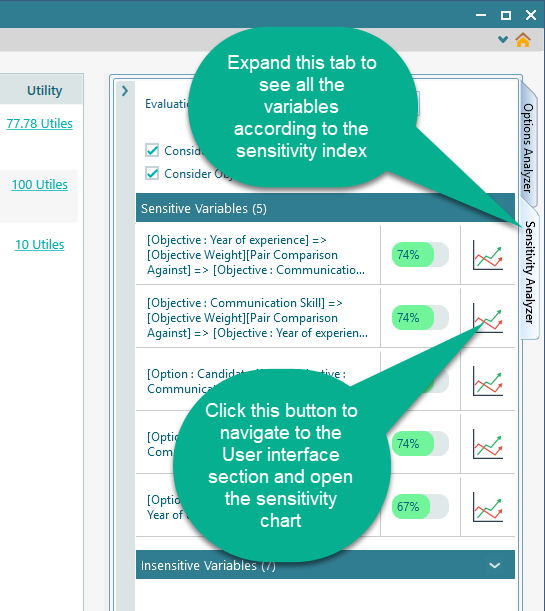
You should always perform a sensitivity analysis to understand the robustness of the decision you are going to make. The sensitivity analysis shows you which input can affect more than another input that results in a conclusion. You can click this Sensitivity button beside each input to see how the input change affects the winning options.
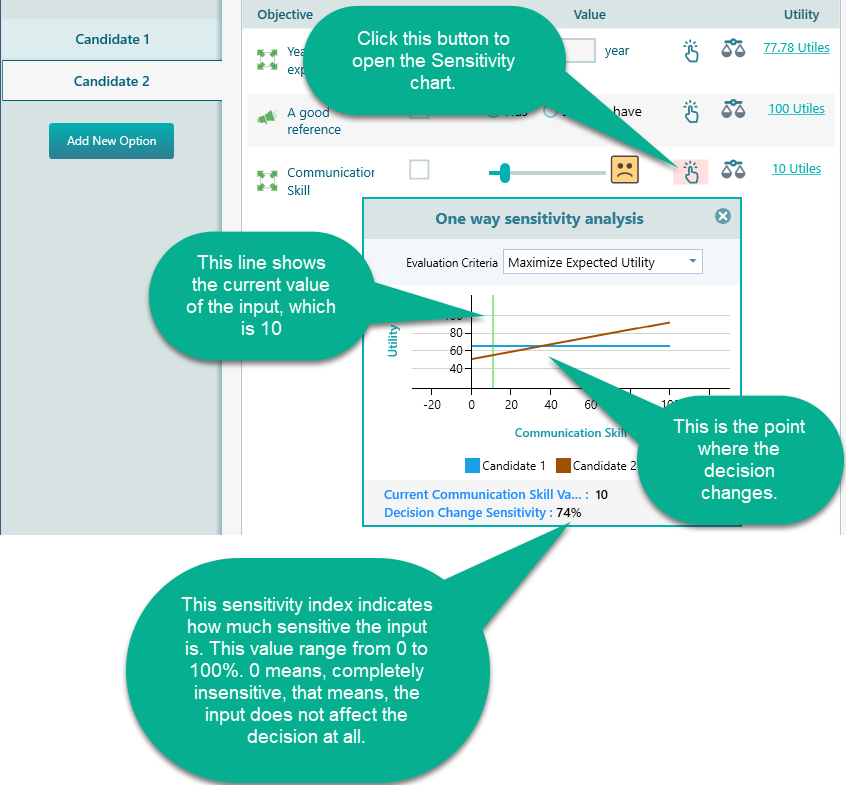
Expand the Sensitivity Analysis tab, and you will see all variables (input) are arranged according to the sensitivity index in descending order. The most sensitive variable shows up at the top. Click the Chart button to navigate to the Input section and open up the sensitivity chart of that input.