If you are in RUSH selling your software product or eBook or any digital content, then, you are on the right page. You will need only 5 minutes to start earning money without learning any code of PayPal or ASP.NET. I will show you how you can build a Single Page ASP.NET storefront to sell your digital product. Oh yes, you will need to have a PayPal Business Account. No more complexity and no need to learn from PayPal manuals (hundreds of pages).
SpiceLogic Inc. offers an All-in-one ASP.NET Server Control for PayPal website payments standard. This control covers both ASP.NET Web form and ASP.NET MVC usage. In this article, I will demonstrate the Web Form scenario. You can learn about ASP.NET MVC scenario from the online documentation of this control. Anyway, to follow this article, please download a fully functional trial version of the PayPal control from this link. The trial version of the SpiceLogic PayPal Control got only one limitation and that is, it will submit your customer's payment to PayPal Sandbox, where the licensed version will work both for PayPal Sandbox and PayPal live.
Anyway, once you downloaded the trial version, add the control to your Visual Studio Toolbox. If you are not familiar with the technique on how to add the control to Visual Studio toolbox, please check this documentation page.
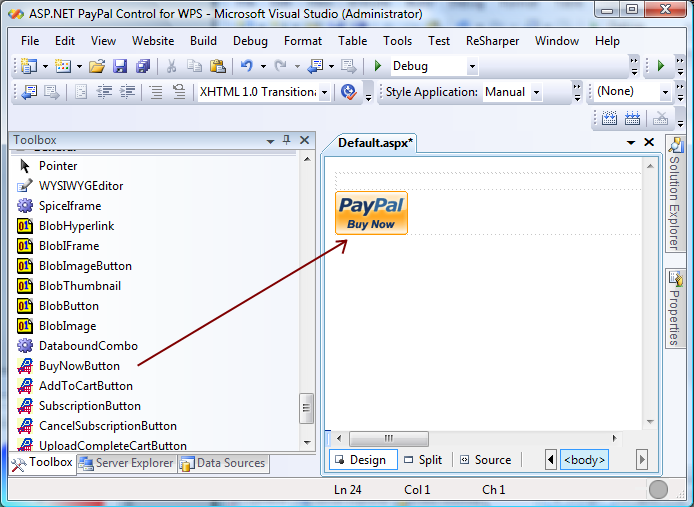
Then, drag and drop the BuyNow button control from your Visual Studio Toolbox as shown here:
Ok, now, say you are selling one of your artwork named "Excellent Artwork – The artist’s choice” and it costs 249.99 US$. Click the smart tag of the control as shown below:
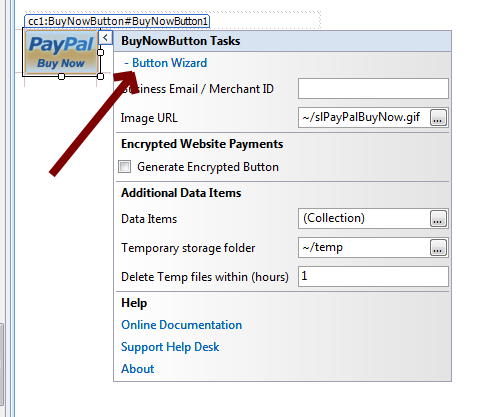
Fill up the field for "Business Email Address / Merchant ID with the email address that is associated with your PayPal account.
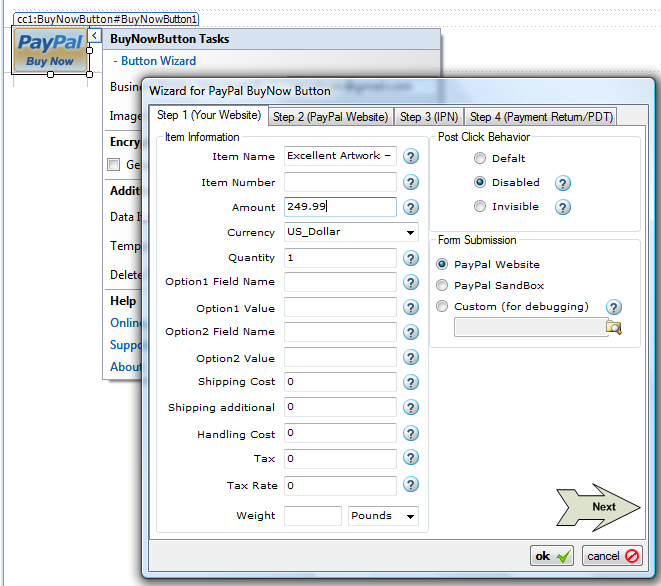
Click the link "Button Wizard” and the following wizard will pop up. Fill up the Item name and price as shown below:
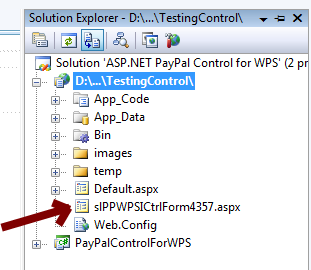
Click OK and Guess what!! You are done. You can upload your ASPX page along with the control DLL to your server’s bin folder and start earning money. It is that simple. Trust me. Nothing else needs to be done just to sell your digital product. Oh yes, there is another file (slPPWPSICtrlForm.4357.aspx) what you need to upload to the root folder of your Website (it is required only for Web Form scenario, not required for ASP.NET MVC scenario) as shown here: (You will find this file in the downloaded zip)
When you upload your ASPX page to your server, the BuyNow button will be shown on the page. When your buyer clicks that button, she will be taken to PayPal website, and PayPal will take care of the rest of the payment procedure. As soon as your buyer clicks the final "Pay Now” button in PayPal website, you will receive an email notification from PayPal that the payment was made and you can take action accordingly.
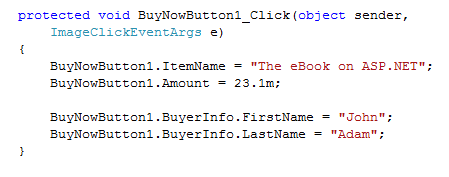
Now, you may be interested in looking into some features of this control. Please note, you did not write any code so far. Even though you won't need to write any code, yet you can do lots of fine-tuning things by using the robust API of this control. You can set the item name, amount and all PayPal supported variables to the button programmatically. This control has Click event, so you can even set the properties just before sending the buyer to PayPal site.
If you are not a novice PayPal user, then, you may ask me "What about generating Encrypted Website Payment Buttons?” Well, if you have all the certificates for EWP ready, you can create the EWP by spending 15 seconds. Simply check the Checkbox from Smart tag as shown below and fill up the EWP form. Nothing else needs to be done.
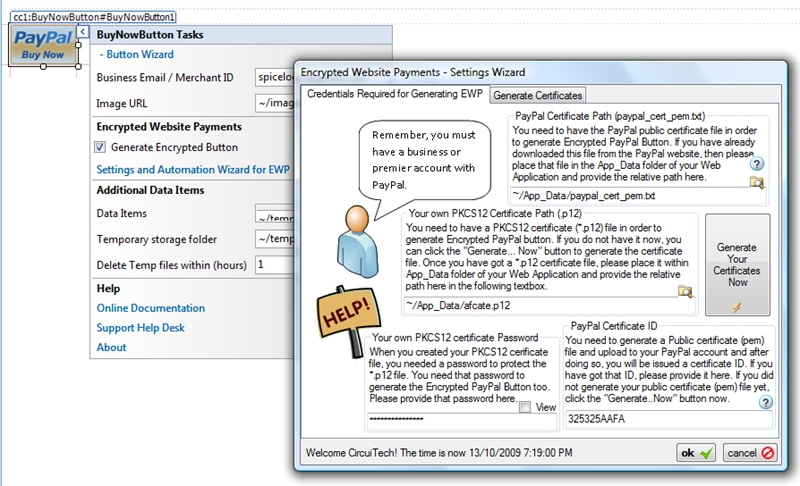
If you did not have the certificates ready, then, this control got built-in certificate generator. Anyway, you may find the details about EWP in the SpiceLogic product’s documentation website. This article is intended for getting your ASP.NET website configured to start earning money in 5 minutes. Considering that goal, you don’t need to use Encrypted Website Payment buttons at all.
If you are a serious e-commerce website developer who wants to automate the digital product delivery as soon as the payment was made, then, you will find this control a life saver. This control comes with 2 featured events that you might not have imagined. They are "IPN_Notified” event and "PayPal_Returned” event. Ok, let’s talk about IPN_Notified event first. As soon as your buyer clicks the final "Pay Now” button in the PayPal website, this control will fire the "IPN_Notified” event asynchronously. Please note the term "Asynchronously”. That means the event will be fired in the background. You can handle this event and get all the transaction related data by its event argument object. Usually, you would use this event to check if the payment was made with the correct amount and log the transaction to your database, send an email notification to your buyer or deliver your digital product as an email attachment to your customer or anything else. BUT, you won’t use this event to set any User Interface Control properties like rendering an HTML message to your users, setting Label’s text property etc. Never do that. Because it is not your user who initiated the HTTP Request to your website as IPN Notification, rather, a separate PayPal Service will initiate an HTTP request to your site which will be captured by the control and the IPN_Notified event gets fired.
The following snippet shows how you can use this event to verify the payment and deliver your digital product.

In order to handle IPN, you don’t need to do anything else. Also, you do not need to login to your PayPal account and turn on IPN related settings. This control will take care of everything smoothly.
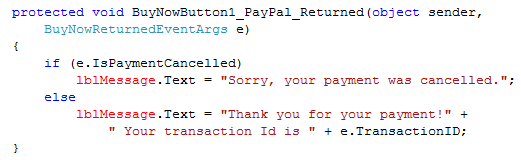
Either you want to automate your product delivery after the payment or not, of course, you would like to say "Thank you for your payment” to your buyer once your customer comes back to your website after the payment. Guess What! The event "PayPal_Returned” is just there for you. This event will be fired as soon as your buyer is returned back to your website from PayPal. When your buyer was taken to PayPal website, he could cancel the transaction and come back to your site too. So, the event argument object of "PayPal_Returned” event will give you all information about the transaction or whether the payment was canceled or not. This event is not an asynchronous background event like the IPN_Notified event. Rather, you can access all GUI Controls of your aspx page from this event. So what are you waiting for? Just add a label to your page named "lblMessage” and use the following snippet to check if the payment was canceled or cleared. If canceled, tell your customer that "Sorry, your payment was canceled” or if the payment was cleared, tell him/her "Thank you”.
You have nothing left to do. Enjoy earning money.
As I promised that you need to spend 5 minutes to get started earning money using your PayPal business account. Do you have some extra minutes to learn about an exciting topic "Payment Data Transfer” or PDT in short? If yes, then, stick with me for next paragraph. Otherwise, you may stop reading.
Ok, what is PDT? PDT is a feature of PayPal website payments standard package where PayPal will give you all the transaction related information upon returning to your site after a successful payment by your customer. When you handled the IPN_Notified event, you noticed that you could get lots of transaction-related information from the IPN_Notified event argument object like
decimal paidAmount = e.PaymentInfo.McGross;

string buyerName = e.BuyerInfo.FirstName + " " + e.BuyerInfo.LastName;

string buyerAddress = e.BuyerInfo.Address.City + ", " + e.BuyerInfo.Address.Country;
When you activate PDT, you will get some data from the PayPal_Returned event argument object.
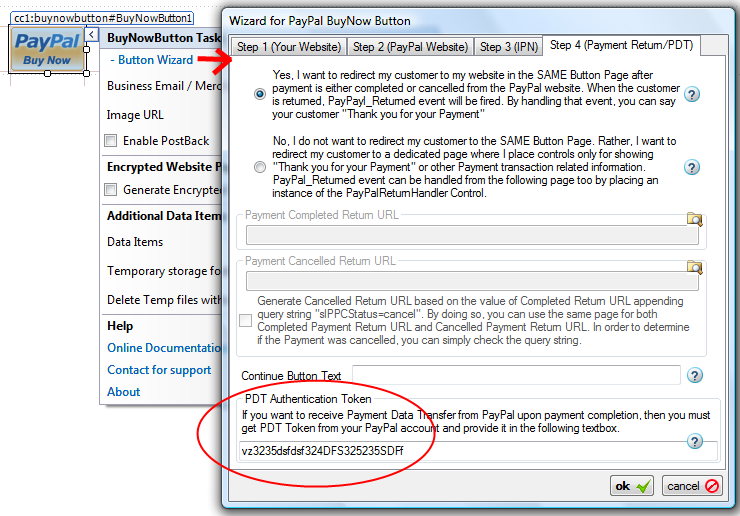
How to activate PDT? Please visit this page to learn about activating PDT. After activating PDT from PayPal account, you will get an identification token named "PDT authentication token" a string value that identifies your account to PayPal. Please provide that PDT token to the control in design time Button Wizard as shown in the following screenshot:
Now, you will be able to use the PayPal_Returned event to check if the transaction was a valid transaction or not, how much money was paid and all other information. The following snippet shows the usage:
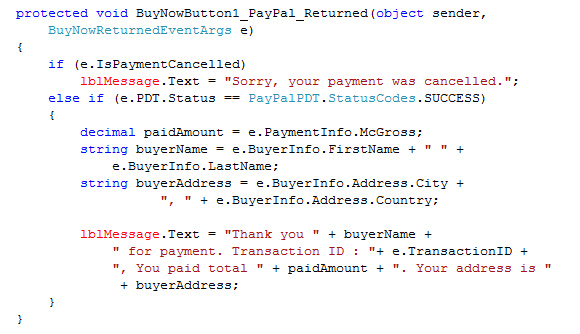
Ok, please look at the code, e.PDT is a property which will contain data only when you have PDT activated. Once you have PDT active, you will get all objects like e.BuyerInfo, e.PaymentInfo accessible.
I have just shown you an example of using PayPal Buy Now button, but this control is not limited to only that button. The assembly comes with a set of controls for various PayPal related transactions like Subscription controls, Donation button control, Upload complete cart control, etc. If you are more interested in this control, please visit the control’s documentation website at this link.
Happy money earning!! ;)